first year beehive management checklist What Every New Beekeeper Needs
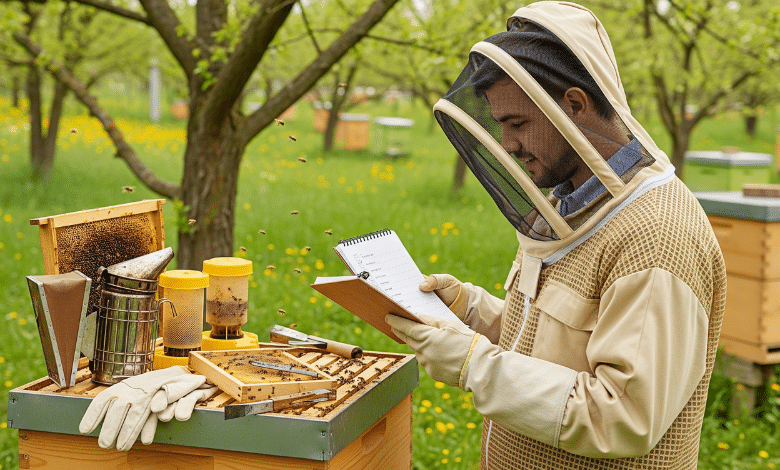
Once you’ve familiarized yourself with the fundamentals of beekeeping, it’s time to dive into the practical aspects, starting with setting up your first beehive. Each step is crucial in ensuring a thriving colony, so let’s break it down into manageable segments.
Choosing the Right Location
The success of your beehive begins with selecting an appropriate location. A properly chosen site can influence everything from bee behavior to honey production.
- Sunlight: Ideally, position your beehive in a location that receives morning sun. This helps to warm the hive early, encouraging bee foraging.
- Wind Protection: Look for a spot that offers some wind protection. Natural barriers like trees or shrubs can act as windbreaks, keeping the bees calm and reducing the risk of their getting chilled.
- Water Source: Bees require access to water. If possible, include a small water feature, such as a fish pond or birdbath, that allows bees to land safely and hydrate.
- Distance from Neighbors: Consider your neighbors. Positioning hives away from property lines can help avoid potential conflicts over their presence.
- Accessibility: Ensure that you have easy access to the hive for regular maintenance and inspections.
After setting up, check the area regularly for signs of bee activity, ensuring they are not causing any issues for yourself or your neighbors.
Assembling and Painting the Hive
Once you have your location, it’s time to assemble and paint your hive. This is a straightforward yet important task to ensure the longevity and health of your bees.
- Assemble the Hive: Begin by following the manufacturer’s instructions to assemble your hive components. This typically includes:
-
- Hive boxes (brood chambers and supers)
- Frames and foundation
- Spacers and accessories
- Make sure all joints are secure and that components fit snugly together.
-
- Painting the Hive: Choosing the right color for your hive matters, as it influences heat absorption.
- Light Colors: White or light colors reflect sunlight, making hives cooler, which is especially beneficial in warm climates.
- Natural Products: Use non-toxic, bee-safe paints.
- Weatherproofing: Ensure that the paint can withstand the elements without peeling or fading.
Consider decorating your hive with fun designs to instill a sense of personality, turning it from a simple structure into a welcoming home for your bees.
Installing the Bees
Now that your hive is ready, the exciting part begins: installing your bees! Whether you’re starting with a nucleus (nuc) colony or package bees, the installation process is a critical moment.
- Nucleus Colony: If starting with a nuc:
- Carefully transfer frames from the nuc into your hive, preserving their order to minimize stress on the bees.
- Ensure that the queen is not crushed during this process. Be gentle.
- Package Bees: For package bees:
- Remove the queen cage from the package and hang it in the center of the hive using a twist tie.
- Shake the bees into the hive without using smoke, as they are already stressed from transportation.
- Feeding: Immediately provide sugar syrup (1:1 ratio) to help the bees establish themselves. Hungry bees may struggle to settle in.
- Resting Period: Allow the colony to acclimate for a few days before you dive into inspections. This helps them adjust to their new environment and start foraging.
By following these steps for setting up your first beehive, you’ll create a nurturing environment for your bees, setting the stage for a fruitful beekeeping experience!
Contents
Understanding Bee Behavior
As novice beekeepers set out on their journey, it’s crucial to delve into the fascinating world of bee behavior. Understanding how bees interact with each other, their colony dynamics, and recognizing both healthy and unhealthy behaviors will significantly enhance your beekeeping experience. Let’s explore these aspects thoughtfully.
Roles Within the Hive
In a bee colony, every bee plays a specific role that contributes to the hive’s overall success. Here’s a brief overview of the primary roles:
- Queen: The heart of the colony, the queen is responsible for laying eggs. A healthy queen can lay up to 2,000 eggs per day during peak seasons.
- Workers: Female bees that don’t reproduce; they perform a variety of tasks throughout their lives, including:
- Foraging for nectar and pollen
- Cleaning the hive
- Caring for the brood (larvae and pupae)
- Defending the hive
- Drones: Male bees whose sole function is to mate with a queen. Drones are expelled from the hive in fall as the colony prepares for winter.
Understanding these roles helps beekeepers identify issues within the colony, such as a failing queen or insufficient foraging activity.
Recognizing Healthy vs. Unhealthy Behavior
A healthy colony exhibits a range of specific behaviors that indicate well-being. Here’s what to look for:
Healthy Behavior:
- Active Foraging: Bees should be out collecting pollen and nectar, returning to the hive with their pollen baskets full.
- Brood Patterns: Look for evenly spaced brood (eggs and larvae) in a predictable pattern. Healthy brood should appear in various stages, showcasing the queen’s effectiveness.
- Calm Activity: The bees behave gently, showing only mild defensive behaviors, especially during inspections.
Unhealthy Behavior:
- Lack of Foraging: A drop in bee activity or empty pollen baskets can indicate issues such as food scarcity or illness.
- Spotty Brood Patterns: Irregular brood patterns or an absence of eggs may signal problems with the queen or disease.
- Aggression: Increased defensiveness can suggest stressors impacting the hive, such as pest infestations or environmental changes.
As a personal anecdote, I once noticed my bees behaving erratically during an inspection. Upon closer examination, I found signs of varroa mites, which required immediate action to prevent colony collapse. Regular hive inspections and observation are key to identifying these problems early.
Swarm Prevention
Swarming is a natural reproductive strategy for honeybees, but it can lead to the loss of your colony. Here are some practical tips to prevent swarming:
- Provide Adequate Space: Regularly check the hive for overcrowding. Adding supers or brood boxes can give bees room to expand, reducing the urge to swarm.
- Monitor Queen Health: Replace a failing queen to maintain colony strength and stability. A healthy queen keeps the colony together and focused.
- Practice Regular Inspections: Frequent hive inspections allow you to spot the formation of queen cells (indicators of swarming) before they become a problem. If you see queen cells, you might consider making splits or adding space to keep the colony from feeling the need to swarm.
By remaining observant and proactive, beekeepers can manage their colonies more effectively, ensuring a thriving and productive experience.
Understanding the behavior of bees not only increases your success as a beekeeper but also deepens your connection to these incredible insects. Happy beekeeping!
Hive Management Throughout the Seasons
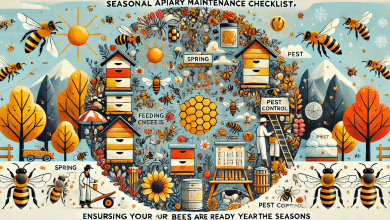
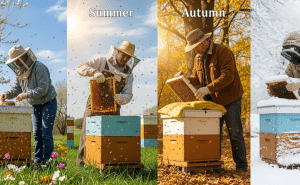
As each season unfolds, beekeeping demands attention and care to keep your colonies healthy, productive, and prepared for the challenges ahead. Here’s a comprehensive look at hive management practices for spring, summer, and fall to ensure your bees thrive all year long.
Spring Hive Inspection and Maintenance
Spring is a crucial time for beekeepers as colonies emerge from winter and begin to grow rapidly. At this stage, your focus should be on checking the health of the hive and setting the colony up for success.
- Initial Inspection:
- Warm temperatures (above 10°C / 50°F) indicate it’s time to open the hive.
- Observe bee activity at the entrance and perform a quick check under the lid to assess the population and activity levels.
- Brood Evaluation:
- Look for signs of a healthy queen by checking for eggs and larvae across several frames. Eggs should appear in clusters, and larvae should be healthy and well-fed.
- Varroa Management:
- Spring is the ideal time to manage varroa mites. Use methods such as alcohol washes to assess mite levels. If counts exceed the threshold, treat accordingly with registered treatments.
- Feeding:
- If your hive weighs less than 70 lb (32 kg), it likely needs syrup (1:1 sugar to water) to avoid starvation. Feeding should continue until natural foraging begins.
- Comb Management:
- Inspect comb for cleanliness, removing any excess wax and debris. This will promote a healthier environment for your bees.
Keeping detailed records throughout this process is invaluable. You can track growth patterns, treatments administered, and any observations that may inform future hive management decisions.
Summer Hive Maintenance
As the summer heat begins, your focus shifts to maximizing honey production and ensuring the colony remains strong.
- Inspection Routine:
- Check your hives every 10 to 14 days. Look for:
- The presence of the queen, indicated by brood across several frames.
- Potential overcrowding or swarming cues, such as swarm cells formed along the edges of the frames.
- Check your hives every 10 to 14 days. Look for:
- Honey Management:
- If the colony is strong, add honey supers to accommodate their growing populations and nectar collection efforts. Always ensure that frames are available for honey storage as the nectar flow increases.
- Pest Control:
- Regularly monitor for varroa mites and other pests. Treat when necessary, keeping records of mite levels and treatments to assess effectiveness.
- Nutritional Needs:
- Ensure there’s ample forage available. If there’s a pollen dearth, consider providing pollen substitutes to support brood rearing and overall colony health.
Fall Hive Preparation for Winter
As summer transitions to fall, your hive management practices must adapt to prepare your colonies for the winter months.
- Final Inspections:
- Inspect hives to ensure that the brood chamber is full of honey stores necessary for winter survival. Pay attention to the weight of the hive, and feed if necessary.
- Varroa Treatment:
- Conduct final mite treatments as colonies begin to slow down brood production. In cold areas, aim to treat before significant winter cold sets in to ensure low mite levels as the bees cluster for winter.
- Equipment Preparation:
- Clean up the apiary by removing any unnecessary equipment and deadouts. Wrap hives for insulation if you live in colder climates.
- Entrance Reduction:
- Reduce the hive entrance to help protect against mice and maintain warmth.
By staying diligent about your hive management throughout the seasons, not only do you give your bees a fighting chance against environmental stressors, but you also set yourself up for a productive season of beekeeping! Prepare early, stay aware, and engage proactively with your hives to enjoy the rewards of your labor. Happy beekeeping!
Health and Disease Management
Understanding the health and disease management of your bee colony is crucial for beekeepers of all levels. With a growing concern over the effects of diseases and pests on bee populations, it’s essential to stay vigilant. In this section, we’ll explore how to identify common threats, discuss treatment options, and highlight preventive measures to keep your bees thriving.
Identifying Common Pests and Diseases
When managing a beehive, being able to recognize signs of illness or infestation is key. Here are some of the most common pests and diseases that can affect your bees:
- Varroa Mites: Perhaps the most notorious pest, varroa mites are ectoparasites that attach to bees and feed on their bodily fluids. Look for:
- Deformed wings on adult bees
- Dead brood in the cells
- Higher than normal mite counts during inspections (use alcohol washes or sugar shakes for monitoring).
- American Foulbrood (AFB): This bacterial disease can devastate hives. Identify AFB by:
- A “salt and pepper” brood pattern
- A strong, foul odor likened to rotting bees.
- Melting larvae with a sticky consistency that rips when pulled.
- European Foulbrood (EFB): Another bacterial threat, EFB appears as:
- Twisted, yellowish larvae
- A less offensive odor compared to AFB.
- Chalkbrood: This fungal disease produces fungi that turn larvae into hard, mummified remains. Visible signs include:
- White, hard “mummies” in cells.
If you spot these signs, swift action is essential. One time I spotted signs of AFB in one of my hives and reported it to a local beekeeper right away. Quick intervention made all the difference, and while it was a tough lesson, it reinforced the importance of consistent inspections.
Treatment Options
When you’ve confirmed a pest or disease, the next step is treatment. Here are common treatment options for the ailments mentioned:
- Varroa Mites:
- Chemical Treatments: Organically approved products such as Apiguard (thymol gel) or Formic Pro (formic acid) can be effective. Ensure to follow the manufacturer’s instructions regarding application.
- Natural Treatments: Oxalic acid dribble is another method, especially effective when the hive is broodless.
- Foulbrood Diseases:
- AFB: If detected, the most responsible action is to destroy the entire colony and any infected comb, as AFB is highly contagious.
- EFB: Treatment can involve antibiotics like oxytetracycline if legal in your area; however, you might also want to consider requeening if necessary.
- Chalkbrood: As there are no effective treatments, the best remedy is to requeen the colony when possible.
Preventative Measures
Prevention is often your best defense against diseases and pests. Here are practical strategies to maintain your colony’s health:
- Regular Maintenance:
- Conduct inspections every 7 to 14 days. Look for signs of pests and ensure that the queen is healthy.
- Strong Colonies: Keep your colonies strong; they are less likely to be susceptible to diseases. Supplement feeding can help bolster weaker hives during pollen dearths.
- Sanitation: Maintain cleanliness within the hive. Regularly remove debris and dead bees, which can harbor diseases.
- Pest Monitoring: Set up mite monitoring traps within the hive to stay informed of any pest infestations before they reach critical levels.
By staying proactive in managing health and disease, you can ensure a productive and successful beekeeping experience. Remember, knowledge is power, so familiarize yourself with the signs and remedies, and your bees will thank you! Happy beekeeping!
Harvesting Honey and Hive Products
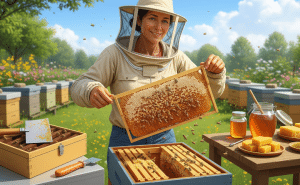
As your first beekeeping year progresses, the sweet reward of your hard work approaches: honey harvest time! Understanding when and how to harvest honey and other hive products ensures you enjoy the fruits of your bees’ labor while keeping their health in check. Let’s explore the vital steps in this rewarding process.
Timing the Harvest
Timing is everything when it comes to harvesting honey. Here are some guidelines to help you determine the right moment:
- Capped Honey: The best indicator that honey is ready to harvest is the presence of capped cells. Ideally, you want to wait until about 70% of the frames are capped. Capping means the moisture content is low enough for long-term storage.
- Seasonal Considerations:
- In many regions, the honey flow peaks around late spring to early summer. Keep an eye on your local flora, as the blooming season will influence honey production.
- For instance, in my experience, the best time for harvest in the Sierra Foothills is right after the blackberry bloom, typically by late June.
- Weather Check: Avoid harvesting during rainy, humid weather, as it can affect honey consistency. Wait for a sunny day to ensure the bees maintain a stable environment in the hive while you’re working.
Extracting and Processing Honey
Once you’ve determined that the honey is ready, it’s time to extract it. Follow these steps:
- Gather Your Equipment:
- Honey Extractor: Manual or electric extractors can be used. They spin frames to fling honey out, minimizing damage to the comb.
- Uncapping Tools: Use an uncapping knife or heated knife to remove the wax cappings.
- Strainer: A fine mesh strainer or cheesecloth will help filter out beeswax particles and debris.
- The Extraction Process:
- Uncap the Frames: Heat your uncapping knife and gently slice through the wax cappings to open the honey cells.
- Place in Extractor: Once uncapped, place the frames in the extractor. Spin to remove honey while being careful not to overdo it, which can destroy the comb.
- Collect Honey: Drain honey into your collection bucket through the strainer to catch any leftover wax and debris.
- Storage: After extraction, pour the honey into clean, dry jars. Ensure they’re sealed well to keep your honey fresh and free from moisture.
Collecting Other Hive Products
While honey is the star of beekeeping, don’t forget about other valuable products your bees create:
- Beeswax: After extracting honey, the leftover frames contain beeswax cappings. Save them! You can melt and filter the wax for use in candles, cosmetics, or food wraps.
- Propolis: This sticky resin is collected by bees from tree buds. It’s often called “bee glue” and has natural medicinal properties. You can scrape it off hive surfaces to collect it.
- Pollen: Some beekeepers choose to harvest pollen traps by placing pollen collecting screens in the hives. Harvested pollen can be dried and stored as a protein supplement.
In my personal journey, I’ve found that every element of the hive adds a new layer to the beekeeping experience. Harvesting honey isn’t just about the flavor; it’s about celebrating the bees’ hard work and your patience. With the right timing and techniques, you’ll be on your way to becoming a proficient honey harvester and a proud steward of your buzzing companions. Happy harvesting!
Equipment Maintenance
Maintaining your beekeeping equipment is crucial to ensure the health of your bees and the success of your operations. Just like a good gardener tends to their tools, a beekeeper must care for their hive gear to keep it functional and effective. Here’s how to keep your equipment in tip-top shape throughout the beekeeping season and beyond.
Hive Tool Care
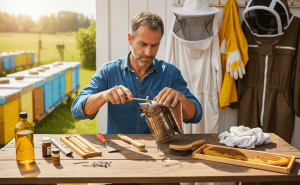
The hive tool is perhaps one of the most essential pieces of equipment for any beekeeper. Here’s how to keep it performing at its best:
- Keep It Clean: After each use, scrape off any wax, propolis, or debris. A clean tool makes your inspections smoother and reduces the spread of diseases.
- Sharpen the Edges: A sharp hive tool will make it easier to pry apart frames and scrape off wax. I like to keep my tool sharp—a dull edge will only frustrate you during those crucial hive inspections.
- Rust Prevention: If you’re using a metal hive tool, ensure you dry it thoroughly after cleaning to prevent rust. You might consider applying a light coat of mineral oil to further protect the metal.
- Storage: When you’re not using your hive tool, store it in a dry place. Avoid leaving it outside, as exposure to the elements can lead to deterioration.
Hive Component Maintenance
Your hives themselves also need regular upkeep to keep them thriving. Here are some aspects to focus on:
- Inspection: Regularly check each hive component—frames, boxes, and bases—for signs of wear and tear. Look for cracks, holes, or any unwanted damage. Seasons change, and so do your hive needs.
- Repair or Replace: Address any damages immediately. A seasoned beekeeper once shared with me, “A stitch in time saves nine,” emphasizing the importance of quick repairs.
- Propolis Management: Bees use propolis for sealing cracks and gaps. While it serves a purpose, too much buildup can make hives cumbersome to inspect. Scrape away excess propolis from surfaces regularly.
- Watertight Check: Make sure that your hives are watertight to prevent moisture buildup. If your hives are wooden, consider applying a thin layer of non-toxic protective paint to keep them safe from the elements.
Storage Tips for Off-Season
As beekeeping slows down, you’ll need to think about the proper storage of your equipment during the off-season:
- Clean Up: Thoroughly clean your apiary equipment before storing it away. This includes hives, tools, and extractors. You wouldn’t keep dirty pots and pans after cooking a great meal, right?
- Protect From Pests: Inspect for pests like wax moths or rodents. Seal equipment properly to discourage unwanted guests from making it their home.
- Dry Location: Store your equipment in a cool, dry place. Moist environments can lead to mold or decay, and nobody wants to deal with that come spring.
- Organize: Use labeled bins or boxes to store different components systematically. This way, when the busy season rolls around again, every tool and component will be at your fingertips, ready to go!
In my beekeeping journey, I’ve found that taking the time to maintain equipment not only prolongs its lifespan but makes the following season’s work far more enjoyable. A little preventive maintenance goes a long way in ensuring the health of your bees and the success of your honey harvest. Happy beekeeping!
Record-Keeping and Hive Tracking
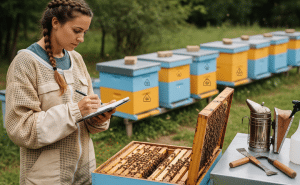
As beekeeping evolves, so does the need for effective record-keeping and hive tracking. Whether you’re a new beekeeper or have been tending to colonies for years, maintaining organized records is essential for both managing your hives and contributing to broader beekeeping insights. Let’s explore why hive logs matter, what should be recorded, and how technology can enhance your hive management.
Importance of Hive Logs
Keeping accurate hive logs is akin to having a roadmap for your beekeeping journey. They help you track the condition of your bees, anticipate their needs, and make informed decisions. Here are a few reasons why you should prioritize record-keeping:
- Health Monitoring: Logs allow you to spot trends in bee health, such as failing queens or rising pest populations.
- Historical Insight: You can reflect on past seasons, assess what worked well, and plan improvements for the future.
- Data Contribution: Accurate records can contribute to nationwide surveys, like the Apiary Inspectors of America, helping researchers and policymakers.
I recall the first time I diligently logged my hive inspections. The previous year had been a disaster due to illness in my bees. This year, with my records at hand, I spotted a pattern in queen laying that indicated something was off, allowing me to take corrective actions swiftly.
What to Record and When
Incorporating a simple checklist can streamline your record-keeping process. Consider the following key elements to record during each hive inspection:
- Date and Weather: Note the date of inspection and the weather conditions. This context can influence bee behavior and health.
- Queen Status: Is the queen present and laying eggs? A simple check for fresh eggs can answer this.
- Brood Pattern: Assess the health of the brood by observing its pattern. A strong hive typically has a nice even pattern, while abnormalities may indicate disease.
- Food Stores: Are the bees well-fed? Check for honey and pollen stores; if they seem low, plan to feed them.
- Pests and Diseases: Record any signs of pests like Varroa mites or small hive beetles. Catching these issues early can save your colony.
Utilizing Technology for Hive Management
As we step into the digital age, many beekeepers have found success with technology to enhance their hive management. Tools and apps allow for easier tracking and analysis of hive data. Some effective technologies include:
- Hive Management Apps: Applications like HiveTracks or BeePlus allow you to log inspections, track mite counts, and even set reminders, all in one place. These apps keep your data organized and accessible from your smartphone.
- Remote Sensors: Devices like BroodMinder can monitor hive conditions, recording temperatures, humidity, and weight. You can access real-time data, which helps you make timely decisions without disturbing the hive.
- Cloud Storage: Many apps store your data in the cloud, ensuring that you don’t lose it even if your device fails. This feature is handy for syncing across multiple devices or sharing data with mentors.
In my experience, incorporating these technologies has saved me time and improved my hive management dramatically. As my bee yard expanded, paper logs became unwieldy, but with a good app, I could track everything from queen conditions to feeding schedules with just a few taps.
A strong record-keeping strategy combined with technological tools will elevate your beekeeping journey. It’s not just about keeping bees; it’s about understanding them and nurturing a thriving hive. Happy beekeeping!
Safety Precautions and Best Practices
Beekeeping is a rewarding hobby, but it also comes with its own set of risks. From bee stings to equipment mishaps, prioritizing safety is crucial. Here, we’ll cover essential safety precautions, handling techniques, and emergency preparedness to ensure a smooth beekeeping journey.
Protective Gear and Proper Handling
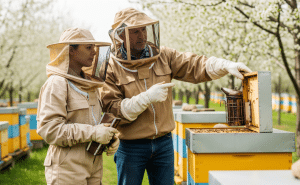
When it comes to working with bees, a beekeeper‘s armor is essential. The right protective gear not only shields you from stings but also helps foster a more comfortable environment for both you and the bees.
- Essential Protective Gear:
- Bee Suit: Invest in a well-fitting bee suit that covers you from head to toe. A lightweight, breathable fabric is best for warmer weather.
- Veil: A veil is critical. It keeps the bees away from your face and minimizes the chances of a sting on sensitive areas.
- Gloves: While some experienced beekeepers prefer to work gloveless, it’s wise for beginners to wear gloves until they gain confidence. Choose thin gloves that allow dexterity.
- Well-Fitted Boots: High-top boots can prevent bees from crawling up your legs which can be a surprising discomfort!
When I first started beekeeping, I opted for a heavy-duty suit that made me feel like I was on a battlefield. Over time, I learned that a lighter, more breathable suit was far more comfortable for me and the bees.
- Proper Handling Techniques:
- Move slowly and calmly around the bees. Quick movements can provoke them.
- Use a smoker lightly before opening a hive. A few puffs of smoke can calm the bees and make for easier handling.
- Always approach the hive from the back to avoid startling the guard bees.
Dealing with Aggressive Bees
Every beekeeper will encounter aggressive bees at some point. Understanding the triggers and how to handle the situation can make the experience less daunting.
- Common Aggression Triggers:
- Poor Weather Conditions: Rain or high winds may make bees more irritable. Plan your work for sunny days.
- Overcrowding: A hive filled to the brim can lead to swarming behavior, increasing aggression. Always ensure there’s enough space for your bees.
- Tips for Handling Aggressive Bees:
- Walk Away: If a hive becomes overly aggressive, it may be time to step back and give them space.
- Close Up Quickly: If you feel them getting agitated, gently but swiftly close the hive. It’s better to collect your data later than to risk a furious swarm.
I remember my first encounter with an aggressive hive; they were particularly territorial one afternoon. I celebrated a small win when I managed to shut the hive with just a few stings— it was a humbling lesson in patience!
Emergency Preparedness
Preparation is key to handling any unexpected situation that may arise while beekeeping.
- Basic First Aid Kit:
- Antihistamines: For mild allergic reactions.
- Ice Packs: To reduce swelling from stings.
- Emergency Bee Sting Venom Kit: If you are known to have severe allergies, carry an EpiPen or similar device.
- Cell Phone: Always have a way to contact someone in case of an emergency.
- Education:
- Know the signs of an allergic reaction: difficulty breathing, swelling beyond the sting area, widespread rash. If any of these develop, seek help immediately.
- Consider taking a beekeeping safety course or first aid course to better prepare.
By following these safety guidelines, you can foster a nurturing environment for your bees and yourself. Each step you take to ensure safety not only reduces risks but also enhances your enjoyment of beekeeping! Happy beekeeping!
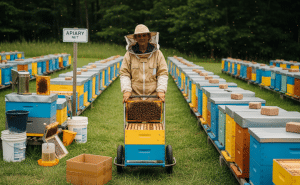
Expanding Your Apiary
As beginning beekeepers gain confidence and experience, the natural progression is to expand their apiary. Adding more hives is an exciting step, but it comes with new responsibilities and considerations. Let’s explore how to assess your readiness for more hives, how to split existing hives, and how to effectively introduce new colonies to your setup.
Assessing Readiness for More Hives
Before diving into expansion, it’s essential to evaluate whether you’re ready for this new endeavor. Consider the following factors:
- Experience: Have you successfully overwintered at least one colony? Being comfortable with the basics of hive management gives you the confidence to handle more.
- Time Commitment: Are you able to dedicate additional time toward more inspections, maintenance, and honey harvesting?
- Space: Ensure you have suitable space for new hives, considering sunlight, wind protection, and access to forage.
- Resources: Think about the necessary equipment and your budget. Are you ready to invest in more hives, tools, or even a vehicle for transporting your colonies if needed?
Reflecting on these points will help you make informed decisions about whether to expand your apiary.
Splitting Hives
Splitting hives is a common strategy for expanding your apiary without needing to purchase new colonies. Here’s how to do it effectively:
- Identify a Strong Colony: Look for a robust hive that has filled at least two deep brood boxes.
- Timing: The best time to split is during the spring when the colony is actively growing.
- Preparation: Prepare new equipment in advance, including boxes, frames, and foundation.
- The Split Process:
- Gently remove about half of the frames from the original colony, ensuring that you include brood, bees, and some stores.
- Place these frames into a new box with an entrance facing away from the mother colony.
- Ensure that the new setup has a queen or queen cell to maintain colony structure and productivity. Requeening can be necessary if you were using emergency cells.
- Monitor and Manage: After splitting, keep an eye on both colonies to ensure they are adjusting well to their new circumstances.
I remember the excitement I felt during my first split; it felt like a rite of passage! Watching the two colonies grow and thrive was incredibly rewarding, but it also taught me about the nuances of colony management.
Acquiring and Introducing New Colonies
If you want to expand by acquiring new colonies, whether through package bees, nucs, or swarms, here’s how to effectively introduce them to your apiary:
- Choosing Healthy Bees: Whether you’re buying a package or a nuc, inspect the colony carefully before purchase. Look for a good laying queen, healthy brood patterns, and adequate food storage.
- Installation: Install new colonies in a different location to avoid robbing from existing hives. Introducing them where they can establish their own territory helps reduce competition and aggression.
- Feeding: If there’s limited foraging available, consider feeding the new colony sugar syrup for a smooth transition. This can help them settle in while they build up their forage capabilities.
By properly assessing your readiness, skillfully splitting hives, and thoughtfully introducing new colonies, you’ll create a thriving apiary full of healthy bees. Expanding your beekeeping journey can be exhilarating, so embrace the experience and enjoy the process!
Thanks for joining us on this journey through the essential first year beehive management checklist! We hope you found this guide helpful as you embark on your beekeeping adventure. Remember, keeping an eye on varroa management and ensuring proper colony nutrition are key to a successful first year. Now, we’d love to hear from you—what’s one aspect of beehive management you’re most excited to learn more about? Share your thoughts in the comments below, and happy beekeeping!
