How to Document and Share Your Experiences with New Queen Bees
Beekeeping is a captivating and rewarding hobby, and at its heart lies the queen bees. Understanding her role not only enhances one’s knowledge but also improves the overall health and productivity of the hive.
The Central Figure of the Hive
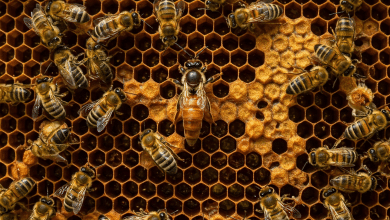
The queen bees is undeniably the central figure in a honey bee colony. She is primarily responsible for egg-laying and regulating the hive’s unity through her pheromones. These chemical signals not only help maintain harmony among worker bees but also ensure that everyone is aware of her health status. This creates a well-functioning community where each bee understands its role.
As Mark Williams highlights, rather than being the domineering ruler some might envision, the queen functions more like a central puppet within an intricate social structure dominated by worker bees. It’s highly insightful for beekeepers to recognize that:
- Only One Queen: Each hive typically contains a single queen bees.
- Egg-Laying Machine: A healthy queen is capable of laying over 1,500 eggs daily, more than her body weight!
- Role of Worker Bees: The queen relies entirely on the worker bees for feeding, grooming, and maintaining her health.
queen bees Health and Productivity
The productivity of a colony hinges on the queen’s health. A strong, vibrant queen leads to a robust hive, while a weak or old queen can spell trouble. Therefore, beekeepers must assess the queen’s health during regular hive inspections. Here’s what to keep in mind:
- Physical Appearance: A healthy queen has a long, slender body compared to worker bees. Spotting her quickly can be easier if she’s marked, which is highly recommended for efficiency.
- Bee Behavior: If workers are attentive and protective of the queen, it’s often a sign she is healthy. Disinterest or aggression can indicate problems that need addressing.
- Egg Production: Count the number of fertilized and unfertilized eggs. An optimal ratio signals a productive queen.
Understanding these signs not only helps in maintaining the colony but also enhances the beekeeper’s experience, leading to greater satisfaction.
Swarming and Requeening
One fascinating aspect of queen bees is their role in swarming. When a hive becomes overcrowded or stressed, workers will create new queen cells, signaling that the hive is preparing to split. The colony’s decision to swarm is not taken lightly. Consider the following:
- Swarming Process: The existing queen will stop being fed by worker bees to prepare for her flight. Eventually, she will take half the colony to a new location, leaving behind a new queen to thrive.
- Post-Swarming Behavior: When the new queen emerges, she may eliminate her sister queens to solidify her reign. This brutal, yet essential, behavior ensures the survival and unity of the colony.
- Requeening: Beekeepers often replace aging or unproductive queens to improve hive dynamics. Utilizing a queen from a different genetic lineage can promote genetic diversity, which is beneficial for the overall health of the colony.
Significance of a Strong Queen
A vital aspect of successful beekeeping is recognizing the importance of having a robust queen. An aging queen may lay fewer eggs, resulting in reduced worker populations and, ultimately, a decrease in honey production.
- Routine Replacement: Many beekeepers opt to replace queens annually, even if she continues to lay. This ensures they have a vibrant, youthful queen in the spring to kickstart the colony’s productivity.
- Queen Induction: When introducing a new queen to a hive, beekeepers must carefully monitor the acceptance process. Worker bees can sometimes reject a new queen, making it crucial to facilitate a smooth transition.
Understanding the intricate role of queen bees in beekeeping can empower beekeepers, elevate their practices, and enhance their experiences with new queen bees. It’s a fascinating journey, and appreciating the queen’s significance can lead to more productive and harmonious hives.
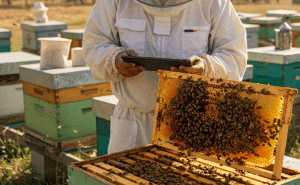
Contents
Documenting Queen bees Experiences
As beekeepers delve deeper into their craft, the significance of documenting experiences related to queen bees emerges as a critical practice. Keeping records not only aids in tracking the health and lineage of the queen but also enhances the overall management of the hive. Through careful documentation, beekeepers can make informed decisions that lead to healthier colonies and increased productivity.
The Importance of Keeping Records
Tracking the history and performance of queen bees allows beekeepers to monitor their strengths and weaknesses. Understanding factors that influence a queen’s performance can make a significant difference in the yield of honey and the health of the colony.
- Queen Lineage Tracking: By documenting the lineage of each queen, beekeepers create a family tree that helps identify desirable traits. For example:
- Queen #1 lays 2,000 eggs per day and produces robust workers.
- Her daughter, Queen #2, is noted for her calm demeanor and high honey yield.
A system of numbering and recording queens using marked pages or tags can ensure that each queen’s data is easy to access.
Methods for Documenting Queen Bees Experiences
A well-organized system can simplify record-keeping. Here’s a successful strategy that works for many beekeepers:
- Ring Binder System:
- Assign each queen a numbered page in a dedicated ring binder.
- Record the queen’s details, including breeding information, health checks, and any issues encountered.
- This binder can act as a historical record. For instance, if a queen is superseded, the new queen can inherit her page, allowing for continuity.
- Numbered Tags:
- Use plastic tags that hang from the brood box, corresponding to each queen. This ensures easy identification and tracking as queens move or swarm.
- Note any significant changes on the tag, such as:
- Date of introduction
- Any health problems or treatments
- Color Coding:
- Implement a color-coding system to document the age of queens visually.
- For example, queens may be marked in different colors based on their year of birth, helping know immediately how long they have been in service without going through extensive records.
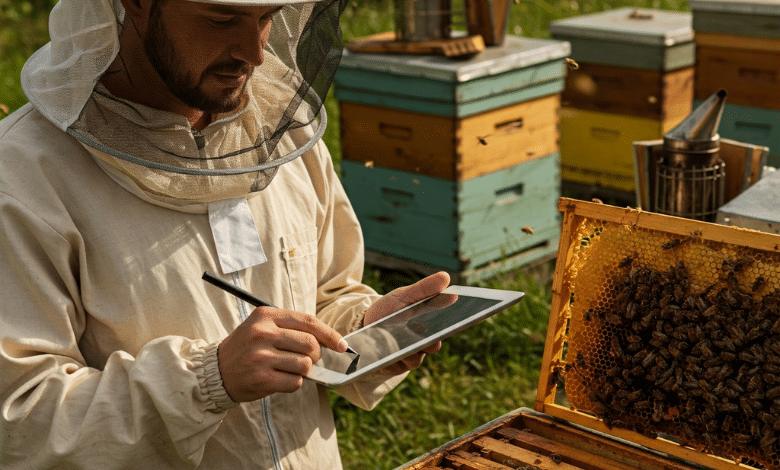
- Digital Records:
- Some beekeepers opt for digital documentation. Apps or spreadsheet programs can provide searchable databases with comprehensive data about each queen.
- This method allows for easy updates and sharing among fellow beekeepers.
Personal Anecdotes: Learning from Experience
One experienced beekeeper shared that a comprehensive documentation system helped him trace health issues back to a specific queen lineage. After noticing poor performance in a particular hive, he referred to his records and realized that the queen was the daughter of a known low-yielding queen. This insight led him to requeen that hive with a queen from a proven line.
Similarly, another beekeeper emphasized the value of tracking not just performance but also circumstances around a queen’s introduction:
- Example Note: “Introduced Queen #3 on May 15, showed signs of aggression for the first 24 hours, monitored interaction closely. After the initial acceptance, she began laying effectively within a week.”
These records proved invaluable for adjusting techniques and managing expectations in future queen introductions.
Continuous Improvement Through Documentation
Regularly reviewing and analyzing documented experiences with queen bees enables beekeepers to refine their practices. Patterns may reveal when certain queens perform best, or identify external factors affecting hive health.
- Accountability: By maintaining detailed records, beekeepers hold themselves accountable for their practices. They can easily update their methods based on past experiences, ultimately leading to healthier colonies.
In conclusion, documenting queen bees experiences is not just about keeping track; it’s about evolving as a beekeeper. The insights gained through these records can guide decision-making processes, paving the way for thriving hives and successful beekeeping endeavors. Whether through traditional notetaking or digital records, the importance of this practice cannot be overstated. Utilizing these documentation skills facilitates a deeper connection with the bees, enhancing the beekeeper’s overall experience.
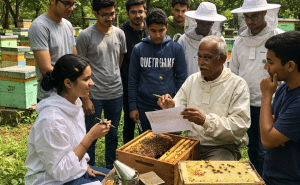
Sharing Your Queen Bees Experiences
One of the most rewarding aspects of beekeeping is the opportunity to share experiences with others. Whether you are a novice beekeeper or a seasoned pro, your insights about queen bees can greatly benefit fellow enthusiasts. The act of sharing not only reinforces your own understanding but also fosters a sense of community among beekeepers.
The Value of Community Knowledge
Communities thrive on the sharing of knowledge, and beekeeping is no exception. Engaging in discussions about queen bees—including introductions, challenges, and successes—helps create a pool of information that all members can draw from. For instance, when beekeepers relate their experiences with different queen breeds, such as Saskatraz or Carniolans, it allows others to weigh the pros and cons before making decisions for their own hives.
- Mutual Learning: By recounting your experiences, you learn from others as well. A fellow beekeeper might share a method of queen introduction that you hadn’t considered, or provide insights into the temperament of different bee strains.
- Building Relationships: Engaging in these dialogues strengthens bonds among beekeepers. Connecting with others over shared interests can lead to friendships that extend far beyond the hive.
Documenting and Sharing Specific Experiences
When you share your queen bees experiences, it helps if you provide detailed insights. This can include your methods of introduction, the challenges you faced, and how you overcame them. Here are some suggestions on what to include:
- Queen Breeds: Share which breeds you’ve worked with and your impressions of their productivity, temperament, and resilience.
- For example, “I have worked extensively with Saskatraz queens, and I find that they exhibit great honey production and better mite resistance compared to some of the other honeybee stock I’ve raised.”
- Introduction Techniques: Discuss the specific methods used to introduce new queens into your colonies.
- A firsthand account could look like this: “When I introduced my new queen, I utilized a JzBz queen introduction cage. After leaving it in place for 24 hours, I observed that the workers accepted her without any aggression.”
- Challenges and Solutions: Relaying challenges can help others avoid similar pitfalls. Describe what went wrong and how you resolved those issues.
- You might say, “Initially, I introduced a new queen into a colony with a failed queen. The workers seemed agitated. After realizing my mistake, I removed the failed queen and followed a proper introduction method, resulting in successful acceptance.”
- Wintering and Survivability: Providing insights into seasonal experiences is also valuable. Discuss how different queens fared during winter months.
- For example: “My Russian queens showed remarkable resistance to harsh winters, with zero losses reported in our cooperative effort. Sharing this has encouraged others in our group to focus more on breeding Russians.”
Using Social Media and Forums
In today’s digital age, social media and online forums are excellent platforms for sharing your experiences. Participating in beekeeping groups allows you to reach a broad audience, receive immediate feedback, and engage in lively discussions.
- Share Photos: Visual documentation of your bees and hives can greatly enhance your narrative. Post pictures showing your queens, queen cells, or even your hive setups.
- Blogs and Vlogs: If you enjoy writing or talking, consider creating a blog or a video diary documenting your beekeeping journey. This allows you to express yourself creatively while imparting valuable information.
- Online Contributions: Websites such as local beekeeping associations or broader platforms like The Beekeeping Network can serve as outlets for sharing your experiences with a community eager to learn.
Conclusion: Your Story Matters
In the world of beekeeping, sharing your queen bees experiences is invaluable. It not only enriches your own journey but also empowers and educates your fellow beekeepers. Every story, from the triumphs to the challenges, adds to the collective knowledge of the community. Remember, your experiences can make a significant difference, helping others navigate their own beekeeping adventures. So don’t hesitate—share your journey, and watch the community flourish!
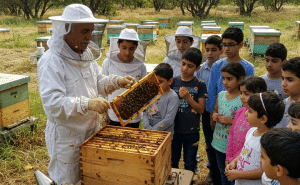
Educating Others about Queen Bees
Educating others about queen bees is an invaluable way to share knowledge, ignite passion, and promote a better understanding of beekeeping. Queen bees play a crucial role in the hive, and imparting this knowledge can deepen the impact of community outreach. Effective teaching can inspire future beekeepers and foster a greater appreciation for these remarkable insects.
The Importance of Engaging Presentations
To effectively educate your audience about queen bees, consider how you present the information. Engaging presentations can turn complex topics into digestible pieces that resonate with participants. Here are some tips for effective communication:
- Visual Aids: Utilize photographs and slides to showcase the beauty and intricacies of queen bees.
- For instance, showing macro images of a queen laying eggs can capture the audience’s attention, making the experience visually stimulating.
- Observation Hives: If possible, bring live bees in an observation hive.
- Allowing your audience to watch a queen in action can create a powerful learning experience, as they can see her behaviors first-hand.
Using sensory elements engages different parts of the audience’s brain, enhancing retention and understanding.
Know Your Audience
Understanding the demographic you are speaking to is essential. Tailoring your presentation to suit the audience ensures that your message resonates. For instance:
- New Beekeepers: Begin with the basics, such as how a queen bees is different from worker bees, and the essential roles she plays in the hive.
- Share personal stories of your early experiences, including mistakes you made, to help them feel more comfortable in their journey.
- Children: Incorporating games and interactive activities can help keep kids engaged.
- For example, you might create a game called “Queenspotting,” where participants identify the queen in various images. Letting them handle beekeeping tools or visit a station with honey samples can also spark their interest.
Using relatable anecdotes and amusing stories can break the ice and create a warm environment for learning.
Sharing Facts and Fun Tidbits
People love interesting facts, especially when they can share them later! Including fascinating nuggets of information about queen bees can enrich your presentation:
- Queen Lifespan: Did you know that a queen bees can live for several years compared to the few months of worker bees? Sharing such trivia can leave a lasting impression on your audience.
- Egg-Laying Capacity: You can highlight how a queen can lay over 1,500 eggs daily, establishing her as the heart of the colony.
Pairing these facts with images or engaging storytelling can make the learning process more dynamic and memorable.
Providing Takeaways
At the end of your presentation, consider offering tangible takeaways for your audience. This could include lists of books, resources, or websites to help further their knowledge about beekeeping and queens specifically. Here are some ideas:
- Resource Sheets: Create a list of “10 Steps to Start Beekeeping” or “5 Ways to Help Bees in Your Garden,” which audience members can take home.
- Flower Seed Packets: Consider providing packets of flower seeds that attract bees. This gives participants a practical way to contribute to bee conservation in their own gardens.
Takeaways help ensure that your audience remembers your presentation long after it’s over, encouraging them to delve deeper into the subject.
Fostering Ongoing Conversations
Encourage your audience to ask questions after your presentation. Create an environment where they feel comfortable discussing their interests, experiences, and goals related to beekeeping.
- Host a Q&A Session: This allows for thought-provoking discussions, where you can address specific concerns and share additional insights from your personal journey, benefiting both new and experienced beekeepers.
- Follow-Up Resources: Consider creating a mailing list or a social media group where interested participants can stay connected. This provides a platform for sharing updates, further resources, and ongoing support.
Educating others about queen bees is a meaningful way to inspire passion and commitment to beekeeping practices. Through engaging presentations, relatable anecdotes, and tangible takeaways, you can effectively spread knowledge that not only informs but also excites. As beekeepers educate their communities, they contribute significantly to the preservation and promotion of these essential pollinators.
How do you introduce a new queen bee?
Introducing a new queen bee into a hive is one of the most critical tasks a beekeeper faces. A successful introduction can rejuvenate a colony, enhance productivity, and maintain the overall well-being of your bees. However, improper introductions can lead to conflicts, aggression, and ultimately the rejection of the new queen. Whether you’re a novice or seasoned beekeeper, understanding the nuances of queen introduction can significantly improve your beekeeping success.
Preparation Before Introduction
Before introducing a new queen, it’s essential to ensure that your hive is ready. The following steps will help set the stage for successful integration:
- Confirm Queenlessness: Ensure the colony is truly queenless. A colony with a failed queen or an unmated virgin queen is unlikely to accept a new queen. If the hive is active and aggressive, it’s worth examining closely to verify the absence of a functioning queen.
- If you can’t find the queen, look for signs such as:
- Worker bees acting erratically.
- Unusual brood patterns, like multiple eggs in a cell or laid drone eggs.
- If you can’t find the queen, look for signs such as:
- Remove the Old Queen: If you’ve established that the colony is indeed queenless, it’s important to remove any old queen. This can be a delicate process, so handle it carefully.
- Consider humane euthanasia methods to prevent any distress, such as placing the queen in the freezer or relocating her far from the hive.
- Queenless Transition Period: Allow the colony to spend some time queenless, ideally between 2 to 24 hours. This period helps the bees acknowledge they are without a queen, making them more receptive to a new one later.
Choosing the Right Queen
When it comes to the type of queen you are introducing, a mated queen is generally recommended over a virgin queen. Mated queens are more likely to be accepted, having already gone through the mating process and established a pheromone profile that helps them blend into the hive.
- Ordering Your Queen: Plan ahead and order your queen from reputable breeders. During peak seasons (like late spring), the demand may be high, so ensure that you have made arrangements beforehand.
Introducing the New Queen
The method of introduction can greatly affect acceptance. There are several methods you might utilize, but here’s a straightforward one that often yields positive results:
- Using a Queen Cage:
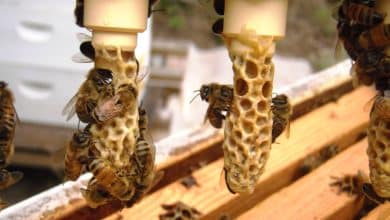
- Most commonly, beekeepers use a cage designed for introduction, such as JzBz cages.
- Attach the queen in her cage and place it in the hive, ideally near the center and above capped brood frames.
- Time-Release Method:
- Instead of using the quick-release method, which can end in disaster, use the time-release method.
- Seal the queen inside the cage with a candy or fondant plug that the worker bees must eat through to release her. This allows the colony to become familiar with her scent gradually.
- This method usually takes about 2-3 days and can significantly improve the chances of acceptance.
Monitoring for Acceptance
After placing the queen in the hive, it’s time to monitor for acceptance carefully.
- Initial Checks: After 24-48 hours, gently check the cage for signs of aggression.
- Look for bees chewing at the cage or attempting to sting through. If the bees appear calm, it’s a good sign.
- Allow Time: Leave the cage in place for approximately 4 days. If the queen has successfully eaten her way out during this time, leave her and the colony undisturbed for an additional 10 days.
- Regularly monitor, but limit disturbances to give the new queen time to acclimate and start laying eggs.
Pitfalls to Avoid
While introducing a queen, there are common mistakes that beekeepers should avoid:
- Introducing a queen into a colony that is not truly queenless.
- Failing to remove the old queen before introducing the new one.
- Choosing a virgin queen when a mated one would be more suitable.
By following a structured approach to queen introduction and understanding the nuances involved, beekeepers can help ensure the health and productivity of their colonies. Investing time in this process can lead to fruitful hives and a thriving beekeeping journey.
In summary, introducing a new queen bees may seem intimidating, but with careful preparation, proper methods, and attentive monitoring, you can successfully integrate a new queen and enhance the vitality of your hive.
How long does it take for bees to accept a new queen?
Understanding the timeline for the acceptance of a new queen bees is essential for any beekeeper. This period can vary based on several factors, including the condition of the colony, the method of introduction, and the temperament of the bees. Typically, the acceptance process can take anywhere from a few days to a couple of weeks, but there are nuances that influence this timeline.
The Role of Queen Pheromones
A queen’s pheromones play a crucial role in her acceptance within a hive. When a new queen is introduced, her unique scent needs to be established within the colony to ensure acceptance.
- Initial Reaction: Upon introduction, the bees will generally gather around the queen, investigating her. The pheromones she emits signal to the workers that she is indeed their new queen.
- Time Frame for Acceptance: Most colonies accept a new queen within the first 2 to 24 hours, especially if they have been queenless during that time.
As personal observation has shown, just recently I introduced a new queen to a colony that had been queenless for about 12 hours. The workers immediately began interacting with her, indicating that acceptance was likely.
Factors Influencing Acceptance Time
Several factors can affect how long it takes for bees to accept a new queen:
- Queen Condition: Mated queens are generally accepted more readily than virgin queens. If a queen is in good health and has been sheltered properly during transport, acceptance is typically smoother.
- Colony Temperament: Beekeeping is not without its challenges; some colonies are more aggressive or resistant due to lack of a queen over an extended period or having a laid-back temperament. Consider the following:
- Aggressive colonies might require longer to adjust, while calm colonies may adapt within a day.
- Current Hive Dynamics: If any worker bees mistakenly see the new queen as a rival, the potential for aggression increases, which can prolong acceptance.
- Introduction Method: The method used to introduce the queen can also influence the acceptance time.
- For instance, using a time-release cage method allows the queen and bees to become familiar with one another gradually. This slower method tends to enhance acceptance rates.
Monitor the Queen Post-Introduction
After introducing a new queen, it’s essential to monitor her condition and the colony’s behavior closely.
- First Few Days: Allow the queen to remain undisturbed for a minimum of 2 to 4 days. During this time, she will typically eat her way out of the introduction cage and begin interacting closely with the workers.
- Four-Day Check: After 4 days, it’s a good idea to lift the queen cage gently to check for signs of acceptance. Look for:
- A calm demeanor from the worker bees.
- Evidence that the queen has escaped the cage.
- In my experience, new queens introduced through a push-in cage often showed visible signs of acceptance within 48 hours. This monitoring helps reassure me that the introduction is going smoothly.
- Extended Period: If the queen remains in the cage beyond 5 days, it’s time to check if there are any barriers preventing her escape, like dead bees blocking the exit.
Signs of Rejection and Intervention
Occasionally, you may notice signs that the bees are rejecting the queen. Signs include aggressive behavior, with the workers attempting to sting the cage, or if they show disinterest and neglect her.
- Failing to Accept: If you observe aggression, don’t panic. Sometimes it’s just the bees adjusting to the new queen’s pheromones, or they may require additional time.
- Corrective Action: To assist in her acceptance, you might try gently reintroducing a few worker bees from the hive with the queen if using a cage. This small colony dynamic can often tip the scales toward acceptance.
The length of time for bees to accept a new queen bees will vary based on several factors, but generally falls within a few days to a couple of weeks. By carefully preparing the hive, understanding the significance of pheromones, and monitoring the colony’s behavior post-introduction, beekeepers can significantly enhance the chances of successful acceptance. The intricacies of this process highlight the fascinating nature of bee behavior and the critical role a queen plays in maintaining a thriving hive. With patience and diligent observation, each beekeeper can navigate this essential aspect of beekeeping successfully.
How do you introduce new bees?
Introducing new bees to an existing colony can be a delicate and critical process for any beekeeper. A successful introduction can bolster the strength of a hive, while a failure can lead to aggression, chaos, and the unfortunate loss of bees. Whether you are adding new workers, requeening, or merging colonies, ensuring a smooth transition will foster a healthier hive environment.
Understanding the Basics of Bee Introduction
Before diving into the methods of introducing new bees, it’s essential to understand why the process can be challenging. Bees are incredibly social insects, and their success hinges on the cohesion of their colony. Introducing new bees disrupts this unity and can create tension if not managed correctly.
- Recognizing the Importance: Missteps in the introduction process can lead to rejected bees, aggressive behavior, and even death. Thus, proper technique and timing are crucial.
When planning to introduce new bees, it’s vital to consider whether the colony is currently queenless. As a rule of thumb:
- Queenless Colonies: More receptive to new additions.
- Colonies with a Queen: Adding new bees can lead to conflicts unless done with great care.
Preparing for Bees Introduction
Preparation is key. Here are some steps to take before introducing new bees into your colony:
- Assess the Existing Hive: Ensure that the current colony is healthy and has enough room for new bees. If the hive is crowded, adding new bees can lead to chaos.
- Check for:
- Pheromone Levels: A strong queen pheromone indicates a stable hive.
- Existing Brood and Honey Stores: Ensure adequate resources are present.
- Check for:
- Plan the Introduction Method: Depending on the situation, you may choose one of the following methods to introduce new bees effectively:
- Direct Introduction: New bees can be introduced by simply dumping them into the hive if the colony is particularly docile and accepting.
- Use of a Cage: Introduce bees in a cage that allows interactions with the existing bees while providing a gradual acclimatization period.
Methods of Introducing New Bees
- Direct Dumping: If you are confident in your bees’ temperament, you can add a package of new bees directly into the hive. This method is often used when introducing new packaged bees.
- How to Do It: Gently shake the package over the top of the frames in the brood chamber, allowing bees to disperse into their new home.
- Timing: Aim for an afternoon when bees are most active to minimize disruption.
- Caged Introduction:
- Queen Cage Method: This method allows the new bees to become familiar with the colony at a controlled pace. Use a queen introduction cage to facilitate this process.
- Steps:
- Insert the bees in the cage and place it in the brood area to encourage interaction.
- Allow the bees to become acclimatized for a couple of days before releasing them.
- Observe for aggression, as peaceful interaction can indicate that acceptance is on the horizon.
- Steps:
- This approach works especially well when bees are added alongside a new queen, making the transition smoother.
- Queen Cage Method: This method allows the new bees to become familiar with the colony at a controlled pace. Use a queen introduction cage to facilitate this process.
- Colony Merging: When combining two bee colonies, it is often best to introduce the new bees gradually. This method helps reduce territorial aggression.
- How to Do It: Stack the new colony box on top of the existing box, allowing for gradual mixing over a few days.
- Use of Newspaper: Placing a layer of newspaper between the hives can facilitate a more gradual acceptance as the bees chew through the barrier and mingle.
Monitoring and Adjusting Post-Introduction
After introducing new bees, it’s essential to monitor the interactions closely:
- Observation: Watch for signs of aggression or acceptance.
- Calm Behavior: If the workers are grooming each other or grouping together without hostility, acceptance is likely.
- Patience is Key: Provide the bees with at least a week to adjust before making significant changes or inspections.
In my experience, observing bees after an introduction reveals much about their dynamics. For example, I introduced a new package of bees last spring. Within a few days, calm interactions and increased foraging indicated that the new bees had successfully integrated into the colony.
Introducing new bees to a colony is a careful process that requires preparation, the right technique, and a good understanding of bee behavior. By taking the time to assess the situation, choosing the appropriate introduction method, and closely monitoring the new dynamics, beekeepers can enhance the chances of a successful integration. Whether you are boosting your hive’s numbers or merging colonies, managing these introductions thoughtfully will foster a thriving, harmonious hive environment that benefits both your bees and your beekeeping journey.
How to Get Bees to Accept a New Queen?
Getting bees to accept a new queen is critical for the health and productivity of your hive. A smooth introduction can rejuvenate an ailing colony, but it does require a bit of strategy and finesse. Let’s delve into effective methods that can help ensure your bees embrace their new queen.
Understand the Colony’s Current State
Before introducing a new queen, take a moment to assess the existing colony’s dynamics. This can dictate how well your bees will accept her.
- Queenlessness: Ensure the colony is truly queenless. If there’s a non-laying or failed queen, or if there are virgin queens, the introduction of a new queen may not go well.
- Time Queenless: Aim for a period between 2 to 24 hours of queenlessness prior to the introduction. This timeframe helps calm the bees and creates a sense of urgency for them to accept a new queen.
For example, I once introduced a new queen to a colony that had been queenless for about 6 hours. The workers quickly seemed eager to accept her, indicating that the brief period of queenlessness had worked in my favor.
Choosing the Right Queen
When introducing a new queen, her type matters. Generally, mated queens are recommended over virgin queens, especially if urgency is needed in your hive.
- Mated Queens: A mated queen usually has a better acceptance rate since she has established pheromones and breeding experience, making it easier for the worker bees to recognize and accept her.
- Source Considerations: Ensure you purchase queens from reputable breeders. Quality queens are less likely to encounter problems upon introduction.
Preparation for Introduction
The more prepared you are, the smoother the introduction will go. Here are a few steps to take:
- Check Queen Health: Upon receiving your new queen, verify that she’s healthy and active. If it appears she’s cold, place her in a warmer area to encourage movement. Offering a few drops of sugar syrup can also help rehydrate her.
- Remove the Old Queen: Before introducing the new queen, carefully remove any existing queens in the hive. This prevents conflict, as the presence of an old queen can lead to aggression or even the killing of the new queen.
- Consider using humane methods, such as relocating the old queen away from the hive or placing her in a freezer, where she can peacefully pass.
Choosing the Right Introduction Method
The method of introducing the queen has a significant impact on her acceptance. Consider the following techniques:
- Using a Queen Cage: The most common method involves placing the new queen in a small introduction cage. This cage protects her during the acceptance phase.
- Time Release Method: Using a time-release method allows worker bees to get to know the new queen’s pheromones. Plug the entrance with candy or fondant so that the bees must chew through it to release the queen.
- How to Do It: Hang the cage near the center of the hive, especially close to capped brood frames for best results.
- Allow a few days for the workers to acclimate before you check for acceptance.
- Time Release Method: Using a time-release method allows worker bees to get to know the new queen’s pheromones. Plug the entrance with candy or fondant so that the bees must chew through it to release the queen.
- Direct Introduction: If the colony is particularly passive, you might consider direct introduction by gently shaking the new bees directly into the hive.
- This method requires a calm hive environment to minimize the chance of panic or aggression.
- Nicot Introduction Cage: For more specific situations, using a Nicot cage can help establish the queen. Place it over emerging brood so that the new bees will naturally accept the queen since they will view her as familiar.
Monitoring Acceptance and Making Adjustments
After introducing the queens, ongoing observation is essential.
- Aggression vs. Calm Behavior: After 24-48 hours, check for signs of acceptance. Look for calm interactions; if you notice aggression, the colony might still be adjusting.
- Allow Time for Acclimation: Don’t rush back into the hive too soon. Give the new queen 10 days to settle in before heavy monitoring. During this time, try not to disturb the hive unnecessarily.
In my experience, being patient during this process often results in happier bees and a more productive colony in the long run.
Successfully introducing a new queen to your colony involves careful preparation, choosing the appropriate queen, and employing an effective introduction method. Understanding your bees’ behavior and providing a conducive environment for acceptance can greatly enhance your chances of a successful integration. By following these guidelines, you can foster a thriving hive that contributes positively to your beekeeping journey. After all, a happy queen leads to a happier colony!
That wraps up our guide on documenting and sharing your experiences with new queen bees. I hope you found these tips insightful and that they inspire you to keep detailed records of your beekeeping journey. There’s so much to learn and share within our community, and your experiences can help others grow as well. I’d love to hear what you think—what challenges have you faced when introducing new queens, and how did you document your journey? Let’s keep the conversation buzzing!

